반응형

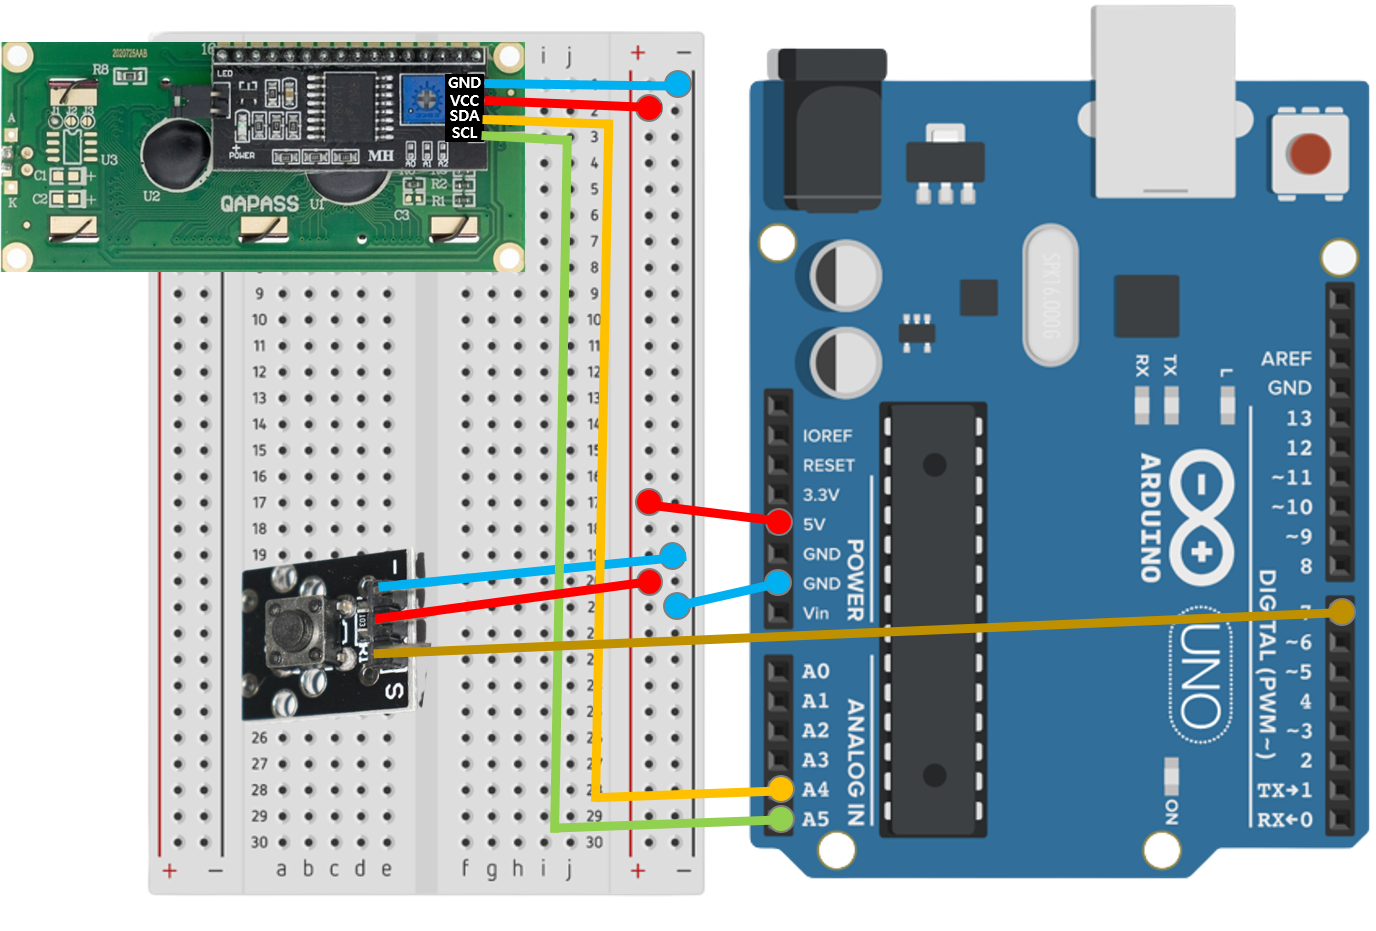
[1] 아두이노 회로도
[2] 아두이노 코드
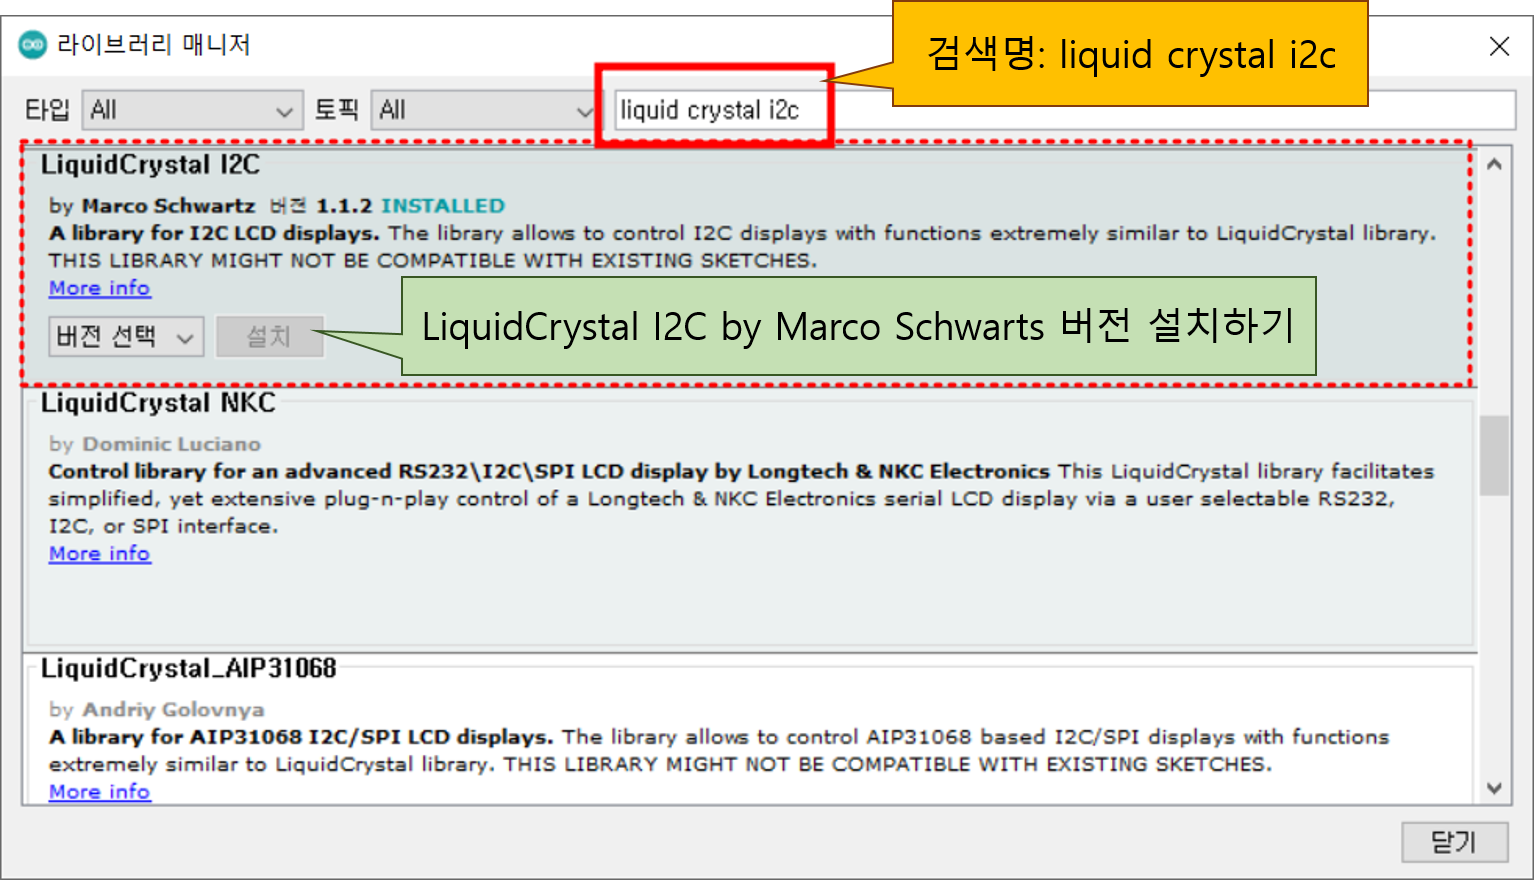
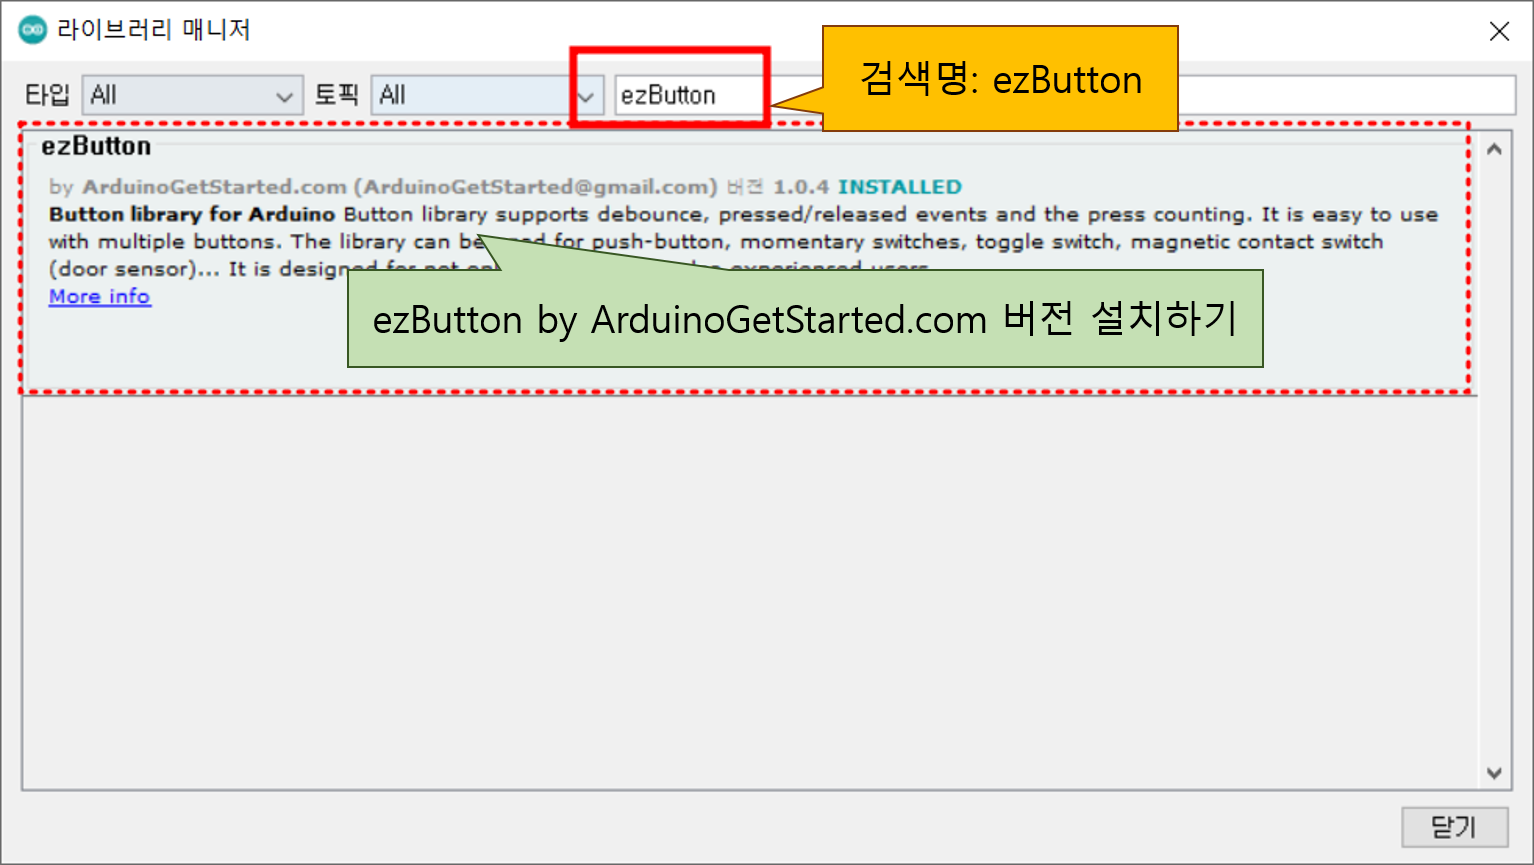
-I2C 라이브러리와 버튼(ezButton)라이브러리 설치하기
-아두이노 코드
#include <Wire.h>
#include <LiquidCrystal_I2C.h> // i2c LCD 라이브러리
#include <ezButton.h> // 버튼 라이브러리

LiquidCrystal_I2C lcd(0x27,16,2); // LCD 객체 설정
ezButton myButton(7);  // button object

int value = 0; // p5js에 전송할 변수

void setup() {
  lcd.init(); // LCD 초기화
  lcd.backlight(); // LCD 불 켜기
  Serial.begin(9600); // 시리얼 통신 시작
  pinMode(13, OUTPUT); // 13번핀 출력모드
  myButton.setDebounceTime(50); // set debounce time to 50 milliseconds
}

void loop() {
  myButton.loop(); // MUST call the loop() function first
  if(myButton.isPressed()) {
    Serial.write(value++); // Arduino => p5js
  }

  if(Serial.available() > 0) { // p5js => Arduino
    byte in = Serial.read(); // 시리얼 데이터 읽기
    lcd.setCursor(0,0);
    lcd.print(in); // LCD에 데이터 출력
    if(in % 2 == 0) digitalWrite(13, HIGH); // LED on
    else digitalWrite(13, LOW); // LED off
  }
}
[3] p5js 코드
See the Pen Untitled by wootekken (@wootekken) on CodePen.
[4] 동작 모습
728x90
반응형
'아두이노(Arduino) > 아두이노 중급' 카테고리의 다른 글
| [아두이노중급.005] LCD/초음파센서/적외선센서/리모콘 테스트 (0) | 2022.06.06 |
|---|---|
| [아두이노중급.003] 앱으로 아두이노 제어하기(스마트홈) (6) | 2022.04.25 |
| [아두이노중급.002]터치스크린으로 아두이노 LED/센서 제어하기 (0) | 2022.01.21 |
| [아두이노중급.001]Nextion 터치스크린 - 소프트웨어 설치 (0) | 2022.01.21 |


댓글